[코드로 이해하는 딥러닝 0] - 글연재에 앞서 https://limitsinx.tistory.com/27
[코드로 이해하는 딥러닝 1] - Tensorflow 시작 https://limitsinx.tistory.com/28
[코드로 이해하는 딥러닝 2] - Tensorflow 변수선언 https://limitsinx.tistory.com/29
[코드로 이해하는 딥러닝 3] - Tensorflow placeholder변수 https://limitsinx.tistory.com/30
[코드로 이해하는 딥러닝 4] - 선형회귀(Linear Regression) https://limitsinx.tistory.com/31
[코드로 이해하는 딥러닝 5] - 다중선형회귀(Multiple Linear Regression) https://limitsinx.tistory.com/32
[코드로 이해하는 딥러닝 6] - 회귀(Regression)에 대한 다른 접근 https://limitsinx.tistory.com/33
[코드로 이해하는 딥러닝 7] - .txt(.csv)파일 불러오기 https://limitsinx.tistory.com/34
[코드로 이해하는 딥러닝 8] - Logistic Regression(sigmoid) https://limitsinx.tistory.com/35
[코드로 이해하는 딥러닝 9] - Softmax Regression(multiple classification) https://limitsinx.tistory.com/36
[코드로 이해하는 딥러닝 10] - MNIST 데이터 분류/One hot encoding https://limitsinx.tistory.com/37
[코드로 이해하는 딥러닝 11] - Deep Neural Network/XOR https://limitsinx.tistory.com/38
[코드로 이해하는 딥러닝 11-EX] - MNIST를 DNN으로 학습해보기/Adam optimizer https://limitsinx.tistory.com/39
[코드로 이해하는 딥러닝 12] - RELU(Rectified Linear Unit) https://limitsinx.tistory.com/40
[코드로 이해하는 딥러닝 13] - .txt(.csv)파일로 저장하기 https://limitsinx.tistory.com/44
[코드로 이해하는 딥러닝 14] - Drop out https://limitsinx.tistory.com/45
[코드로 이해하는 딥러닝 15] - 초기화(Initialization)의 중요성 https://limitsinx.tistory.com/46
[코드로 이해하는 딥러닝 16] - CNN(Convolutional Neural Network) https://limitsinx.tistory.com/47
[코드로 이해하는 딥러닝 2-11] - RNN(Recurrent NN)/LSTM(Long Short Term Memory) https://limitsinx.tistory.com/62
※이 전글에서 정리한 코드/문법은 재설명하지 않으므로, 참고부탁드립니다
※해당 글은 PC에서 보기에 최적화 되어있습니다.

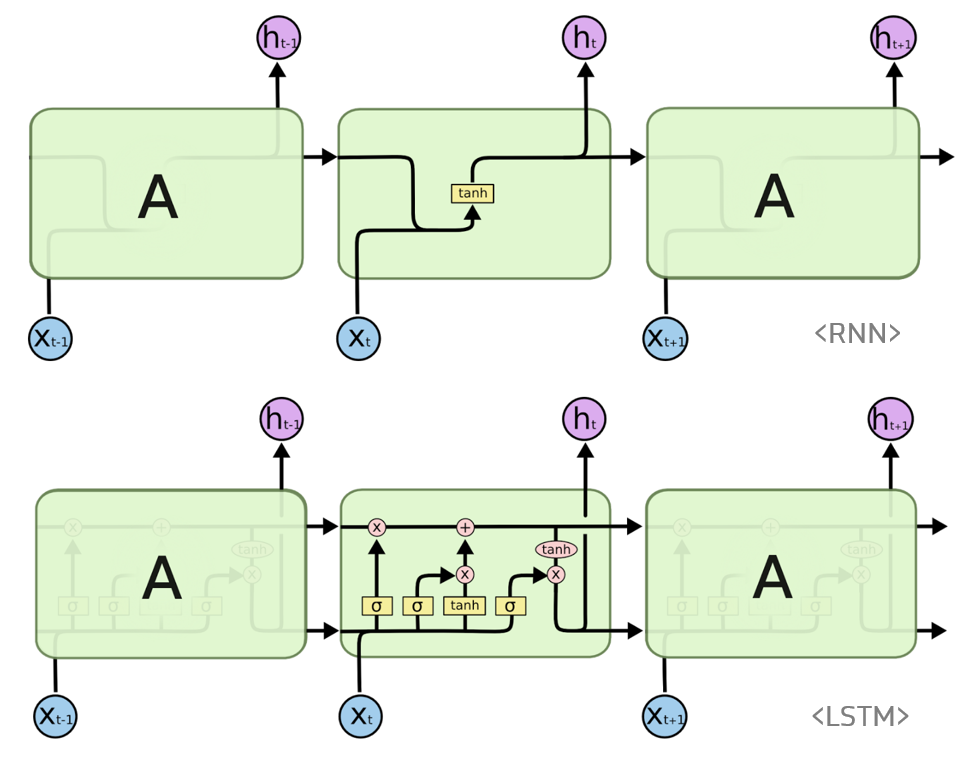
이 전글에서는, RNN과 LSTM의 개념에 대해 간략히 정리해보고
LSTM으로 "Hi Hello"라는 문구를 완성해보기 위해
"Hi Hell" 까지만 x_Data로 주고 "i Hello"라는 Sequential한 값을 정확하게 예측해보는지 학습을 진행해보았습니다.
"hi hello"처럼 간단한 문장만 학습시킨다면 one_hot_encoding을 이전예제처럼 일일히 시켜주면 되지만,
어떤 한 책의 구절 전체를 학습시킨다던가, 책한권 전체를 학습시킨다면....
일일히 한 알파벳씩 one hot encoding을 해줄수는 없을것입니다.
이런 경우에 text를 다루기위해 사용할 수 있는 유용한 함수들과, LSTM을 통해 학습을 진행하여 결과값이 타당하게 나오는지를 한번 확인해보겠습니다.
이번에는 "if you want you"라는 문장을 학습시키고, "if you want yo"까지 주었을때 정확하게 맨 끝 글자를 "u"로 예측하는지를 확인해보는 코드입니다.
[코드 전문]
import tensorflow as tf
import numpy as np
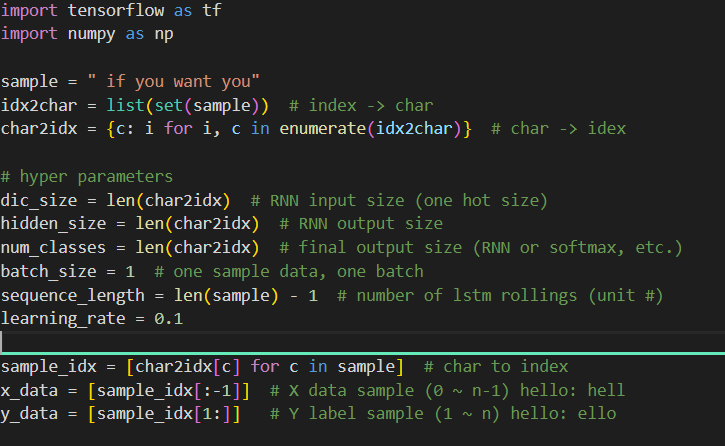
sample = " if you want you"
idx2char = list(set(sample)) # index -> char
char2idx = {c: i for i, c in enumerate(idx2char)} # char -> idex
# hyper parameters
dic_size = len(char2idx) # RNN input size (one hot size)
hidden_size = len(char2idx) # RNN output size
num_classes = len(char2idx) # final output size (RNN or softmax, etc.)
batch_size = 1 # one sample data, one batch
sequence_length = len(sample) - 1 # number of lstm rollings (unit #)
learning_rate = 0.1
sample_idx = [char2idx[c] for c in sample] # char to index
x_data = [sample_idx[:-1]] # X data sample (0 ~ n-1) hello: hell
y_data = [sample_idx[1:]] # Y label sample (1 ~ n) hello: ello
x_one_hot_eager = tf.one_hot(x_data, num_classes) # one hot: 1 -> 0 1 0 0 0 0 0 0 0 0
x_one_hot_numpy = tf.keras.utils.to_categorical(x_data, num_classes) # it'll generate numpy array, either way works
y_one_hot_eager = tf.one_hot(y_data, num_classes)
tf.model = tf.keras.Sequential();
tf.model.add(tf.keras.layers.
LSTM(units=num_classes, input_shape=(sequence_length, x_one_hot_eager.shape[2]), return_sequences=True))
tf.model.add(tf.keras.layers.TimeDistributed(tf.keras.layers.Dense(units=num_classes, activation='softmax')))
tf.model.summary()
tf.model.compile(loss='categorical_crossentropy', optimizer=tf.keras.optimizers.Adam(lr=learning_rate),
metrics=['accuracy'])
tf.model.fit(x_one_hot_eager, y_one_hot_eager, epochs=50)
predictions = tf.model.predict(x_one_hot_eager)
for i, prediction in enumerate(predictions):
# print char using argmax, dict
result_str = [idx2char[c] for c in np.argmax(prediction, axis=1)]
print("\tPrediction str: ", ''.join(result_str))
[코드 분석-1]

① sample = "if you want you"
: if you want you라는 문장을 학습시키겠다는 코드
② idx2char = list(set(sample))
char2idx = {c : i for i , c in enumerate(idx2char)}
: 알파벳 한개씩 one hot encoding을 해주는것이 아니라, 함수로 한번에 처리해주는 코드입니다.
"if you want you"를 list로 만든 다음, indexing(one hot encoding)을 해주는것입니다.
※ if you want you가 통째로 들어가는게 아니고, 중복되는것들은 제외하고 들어갑니다.
즉, 돌려보시면

이렇게 띄어쓰기까지 총 10개를 one-hot encoding합니다.
③ hyper parameter 정리
- dic_size : RNN의 input size로 "if you want you"를 학습시키는것이니, 이 문장의 길이만큼에 해당
- hidden_size : RNN의 결과 값으로 나올것에 대한 길이
- num_classes : 모든 Layer를 거쳐, 최종 output으로 나올 것에 대한 길이
- batch_size : 몇개로 나누어서 학습을 시킬것이냐 인데, 짧은 문장이므로 한번에 학습시키기 위해 1로 선언
- sequence_length : Sequence의 길이인데, length는 0부터 시작하므로, 전체길이에서 1을 빼준것
④ sample_idx
: 각각의 sample_idx에 대해 숫자를 붙여주는것을 의미합니다.

idx2char에서 나온 값들을 숫자로 매핑하여 sample idx처럼 숫자로 나열하는것을 의미합니다.
'y' = 0, 'a' = 1이런식으로 Mapping하여 Sample idx에 맞추어보면
"if you want you"가 정확하게 나옵니다.
이하는 기존 HiHello 학습했을당시와 코드가 동일합니다.
[결과값(softmax)]

정확도 100%로 "if you want yo"까지를 input으로 주었을때 "f you want you"라고 예측하는 것을 확인할 수 있습니다.
[결과값(sigmoid)]

오우 Sigmoid도 역시 잘따라오는것 같습니다.
아마, 문장의 길이가 길어진다던가, 예측을 하는 범위에 난이도를 높일수록 softmax와 차이가 날것같네요 :)
[결과값(relu)]

정확도는 7%정도로, loss function은 nan으로 발산해버린 것을 확인할 수 있습니다.
예측은 "nnnnnnnnnnnn"이라고 하네요..ㅋㅋ
Summary
이번 글은, 새로운 머신러닝 개념이 아니라
이 전글에서 적용했던것을 조금더 확장하여 재구현해보는 코드였습니다. (짧은 문장 -> 긴문장)
이다음 포스팅은, 책의 한 구절에 해당하는 길이의 문장을 학습시켜보도록 하겠습니다.
'DeepLearning Framework & Coding > Tensorflow 2.X' 카테고리의 다른 글
| [코드로 이해하는 딥러닝 2-14] - 딥러닝(LSTM)으로 주가예측하기 (0) | 2021.01.19 |
|---|---|
| [코드로 이해하는 딥러닝 2-13] - LSTM으로 문단 학습시키기 (0) | 2021.01.18 |
| [코드로 이해하는 딥러닝 2-11] - RNN(Recurrent Neural Network)/LSTM(Long-Short-Term-Memory) (2) | 2021.01.16 |
| [코드로 이해하는 딥러닝 2-11] - CNN(Convolutional Neural Network) (0) | 2021.01.15 |
| [코드로 이해하는 딥러닝 2-10] - Drop out (0) | 2021.01.14 |


댓글