[코드로 이해하는 딥러닝 0] - 글연재에 앞서 https://limitsinx.tistory.com/27
[코드로 이해하는 딥러닝 1] - Tensorflow 시작 https://limitsinx.tistory.com/28
[코드로 이해하는 딥러닝 2] - Tensorflow 변수선언 https://limitsinx.tistory.com/29
[코드로 이해하는 딥러닝 3] - Tensorflow placeholder변수 https://limitsinx.tistory.com/30
[코드로 이해하는 딥러닝 4] - 선형회귀(Linear Regression) https://limitsinx.tistory.com/31
[코드로 이해하는 딥러닝 5] - 다중선형회귀(Multiple Linear Regression) https://limitsinx.tistory.com/32
[코드로 이해하는 딥러닝 6] - 회귀(Regression)에 대한 다른 접근 https://limitsinx.tistory.com/33
[코드로 이해하는 딥러닝 7] - .txt(.csv)파일 불러오기 https://limitsinx.tistory.com/34
[코드로 이해하는 딥러닝 8] - Logistic Regression(sigmoid) https://limitsinx.tistory.com/35
[코드로 이해하는 딥러닝 9] - Softmax Regression(multiple classification) https://limitsinx.tistory.com/36
[코드로 이해하는 딥러닝 10] - MNIST 데이터 분류/One hot encoding https://limitsinx.tistory.com/37
[코드로 이해하는 딥러닝 11] - Deep Neural Network/XOR https://limitsinx.tistory.com/38
[코드로 이해하는 딥러닝 11-EX] - MNIST를 DNN으로 학습해보기/Adam optimizer https://limitsinx.tistory.com/39
※이 전글에서 정리한 코드/문법은 재설명하지 않으므로, 참고부탁드립니다
※해당 글은 PC에서 보기에 최적화 되어있습니다.

이제까지 Activation function 3가지(y=wx+b Sigmoid, Softmax)에 대해 정리해보았습니다.
Sigmoid와 Softmax는 weighting이 너무 커지는것을 막기위해 한개 Layer를 통과한값을 0~1사이의 값으로 재분류 하는것이였죠? (이전글 참조)
즉, Laayer의 output이 0~1 사이의 값이 된다는것입니다.
이런경우, Deep Neural Network가 되면 어떻게될까요??
Single Layer Perceptron이였을때는 아무문제 없었지만, Multi Layer Perceptron이 되면서 큰 문제가 발생합니다.
예를들어, Layer의 output이 0.5로 동일하다고 가정을해보시죠
그럼 4개의 Layer를 통과하게되면, output layer에 도달하는 최종값은 0.5*0.5*0.5*0.5=0.000025가 되어버립니다.
10개,20개 Layer를 통과하면, output layer에 도달하는 값이 0으로 수렴하게 되겠죠..
Error back propagation(역전파오류)때도 마찬가지입니다.
"중간 Hidden layer가 많아짐에따라, input layer와 output layer간의 관계가 희미해지는 상황"
이 바로 Vanishing Gradient라는 문제입니다.
hidden layer의 output 값이 0~1사이로 나온다면 Vanishing Gradient(이하 VG)가 발생하고, output값을 날것 그대로 쓰자니.. weighting값이 너무 커질수 있고...
에라 모르겠다! 그럼 반틈은 0, 반틈은 원래값으로 맵핑하자!! 가 ReLU입니다.
믿어지지 않지만, ReLU는 이렇게 생겼습니다..

이렇게 생긴게 학습이 잘돼??
잘됩니다.. VG문제도 말끔하게 해결됬구요
머신러닝은 근본자체가 Heuristic한 학문이라 "이게 왜이래?" "왜 이런 스킬을 써?" 라기 보다는
"아 이런스킬을 쓰니까 더 잘되네?" 이런식으로 접근하는것이 일반적입니다.
요점은 이 ReLU라는 녀석을 써서 학습률이 눈에 띄게 좋아졌고 VG문제도 말끔히 해결했다는 것입니다 :)
이제 코드로 한번 넘어가보겠습니다.
[코드 전문]
import tensorflow.compat.v1 as tf
tf.disable_v2_behavior()
import numpy as np
#W1=tf.Variable(tf.random_uniform([2,5],-1.0,1.0), name='weight1') : -1과 1사이에서 초기화
import random
# import matplotlib.pyplot as plt
from tensorflow.examples.tutorials.mnist import input_data
tf.set_random_seed(777) # reproducibility
mnist = input_data.read_data_sets("MNIST_data/", one_hot=True)
# parameters
learning_rate = 0.001
training_epochs = 15
batch_size = 100
# input place holders
X = tf.placeholder(tf.float32, [None, 784])
Y = tf.placeholder(tf.float32, [None, 10])
# weights & bias for nn layers
W1 = tf.Variable(tf.random_normal([784, 256]))
b1 = tf.Variable(tf.random_normal([256]))
L1 = tf.nn.relu(tf.matmul(X, W1) + b1)
W2 = tf.Variable(tf.random_normal([256, 256]))
b2 = tf.Variable(tf.random_normal([256]))
L2 = tf.nn.relu(tf.matmul(L1, W2) + b2)
W3 = tf.Variable(tf.random_normal([256, 10]))
b3 = tf.Variable(tf.random_normal([10]))
hypothesis = tf.matmul(L2, W3) + b3
# define cost/loss & optimizer
cost = tf.reduce_mean(tf.nn.softmax_cross_entropy_with_logits(
logits=hypothesis, labels=Y))
optimizer = tf.train.AdamOptimizer(learning_rate=learning_rate).minimize(cost)
# initialize
sess = tf.Session()
sess.run(tf.global_variables_initializer())
# train my model
for epoch in range(training_epochs):
avg_cost = 0
total_batch = int(mnist.train.num_examples / batch_size)
for i in range(total_batch):
batch_xs, batch_ys = mnist.train.next_batch(batch_size)
feed_dict = {X: batch_xs, Y: batch_ys}
c, _ = sess.run([cost, optimizer], feed_dict=feed_dict)
avg_cost += c / total_batch
print('Epoch:', '%04d' % (epoch + 1), 'cost =', '{:.9f}'.format(avg_cost))
print('Learning Finished!')
# Test model and check accuracy
correct_prediction = tf.equal(tf.argmax(hypothesis, 1), tf.argmax(Y, 1))
accuracy = tf.reduce_mean(tf.cast(correct_prediction, tf.float32))
print('Accuracy:', sess.run(accuracy, feed_dict={
X: mnist.test.images, Y: mnist.test.labels}))
# Get one and predict
r = random.randint(0, mnist.test.num_examples - 1)
print("Label: ", sess.run(tf.argmax(mnist.test.labels[r:r + 1], 1)))
print("Prediction: ", sess.run(
tf.argmax(hypothesis, 1), feed_dict={X: mnist.test.images[r:r + 1]}))
# plt.imshow(mnist.test.images[r:r + 1].
# reshape(28, 28), cmap='Greys', interpolation='nearest')
# plt.show()
[코드 분석-1]

다른 코드는 [코드로 이해하는 딥러닝11-EX]글과 모두 동일합니다.
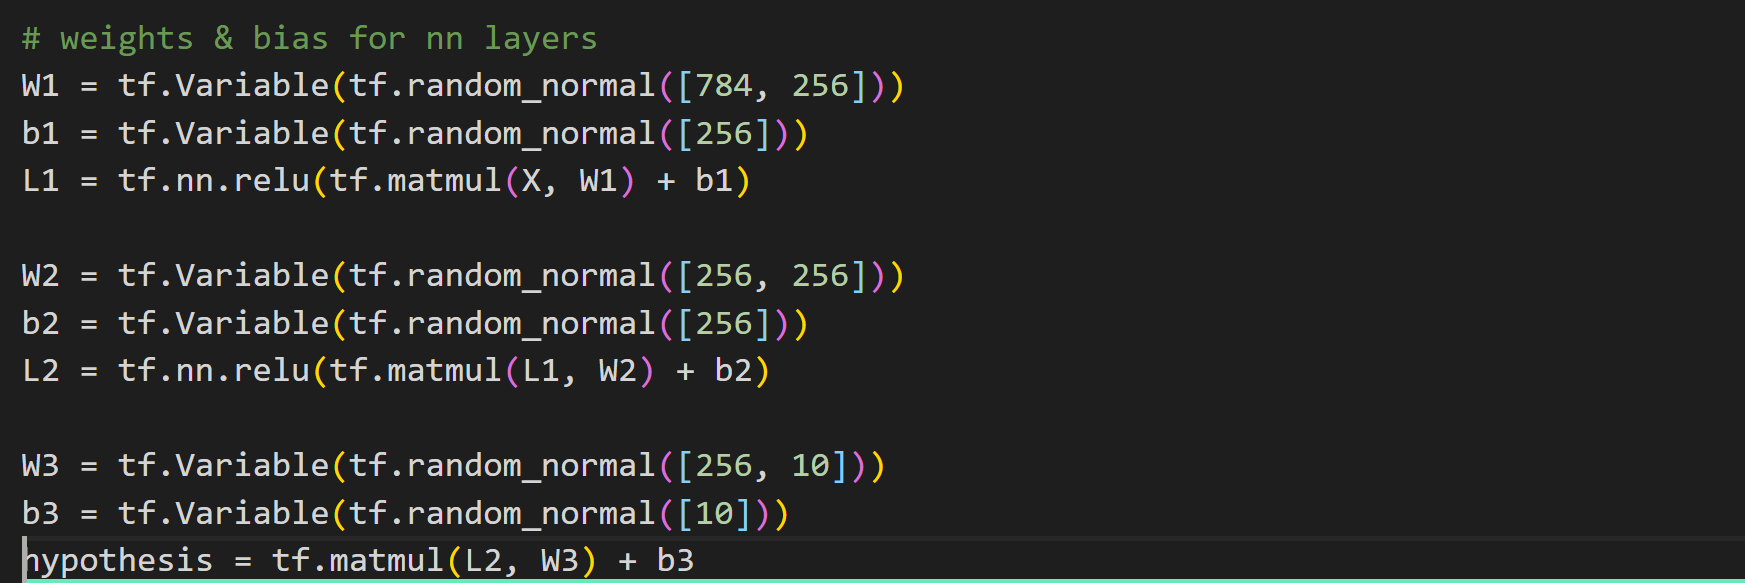
L1=tf.nn.relu(tf.matmul(X,W1)+b1)
이부분만 다른데요, 기존의 softmax를 ReLU로 바꾸어 주기만 했을 뿐입니다.
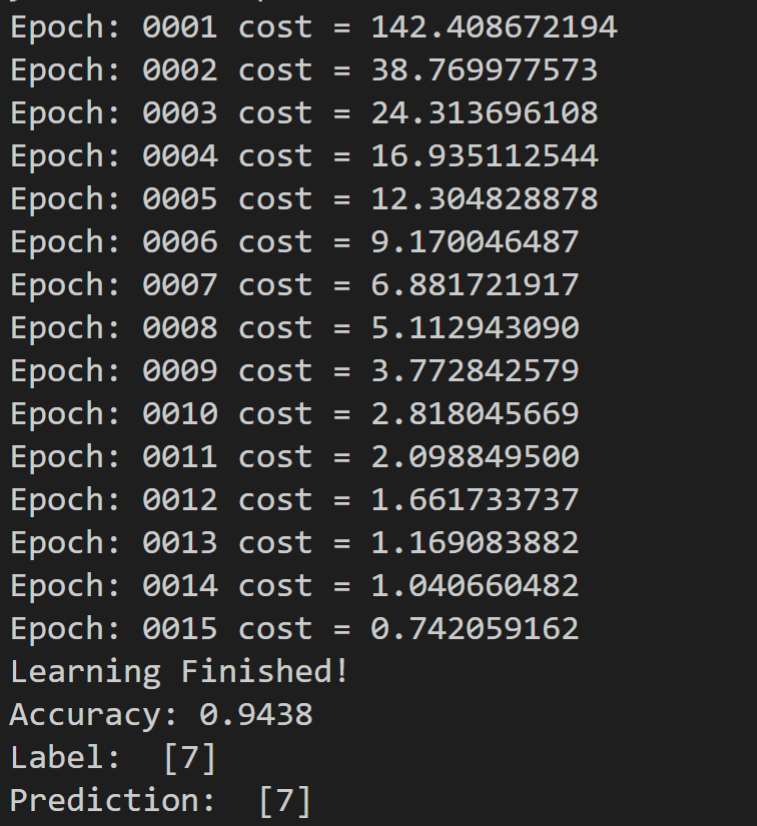
[결과값]

모든 코드를 동일하게 하고 위엣부분만 softmax 에서 ReLU로 바꾸어주었을뿐인데!
MNIST 인식률이 95%에 육박하게 되었습니다.
softmax로는 85%언저리에서 나오는데요, 이렇게 간단한 변화 한개를 통해 10% 정확도가 증가한것입니다.
여기서 우리가 가져야할 의문은 "왜?" 가 아니라 "그럼 더 올릴 수 있는 활성함수는 없나?" 입니다.
"왜?"에 대답하기에는 Deep learning자체가 연산량도 많을 뿐더러, black box이기때문이죠.
아직 이정도수준에서는 black box가 아닙니다.
시간만있으면 현재까지의 코드정도는 weighting과 bias를 모두 얻어낼 수 있는데,
앞으로 정리할 Drop out이나 Ensemble을 섞게되면 정말로 Black box가 되어버립니다.
이외에도 수많은 활성함수(Activation function)들이 있는데요
모두, 장단점이 있으므로 필요에따라, 경우에따라 선택해서 사용해주시면 됩니다!

'DeepLearning Framework & Coding > Tensorflow 1.X' 카테고리의 다른 글
| [코드로 이해하는 딥러닝 14] - Drop out (0) | 2020.12.31 |
|---|---|
| [코드로 이해하는 딥러닝 13] - .txt(csv)파일로 저장하기 (0) | 2020.12.30 |
| [코드로 이해하는 딥러닝 11-EX] - MNIST를 DNN으로 학습해보기/Adam optimizer (0) | 2020.12.25 |
| [코드로 이해하는 딥러닝 11] - Deep Neural Network/XOR (0) | 2020.12.24 |
| [코드로 이해하는 딥러닝 10] - MNIST 데이터 분류/One hot encoding (0) | 2020.12.23 |


댓글